
In this video we review the basic trigonometry needed in order to get the Vpython visualization to work. With this quick trig tutorial, you should have the math you need to finish the project.
Arduino Tutorial 39: Using a Joystick to Control DC Motor Speed and Direction
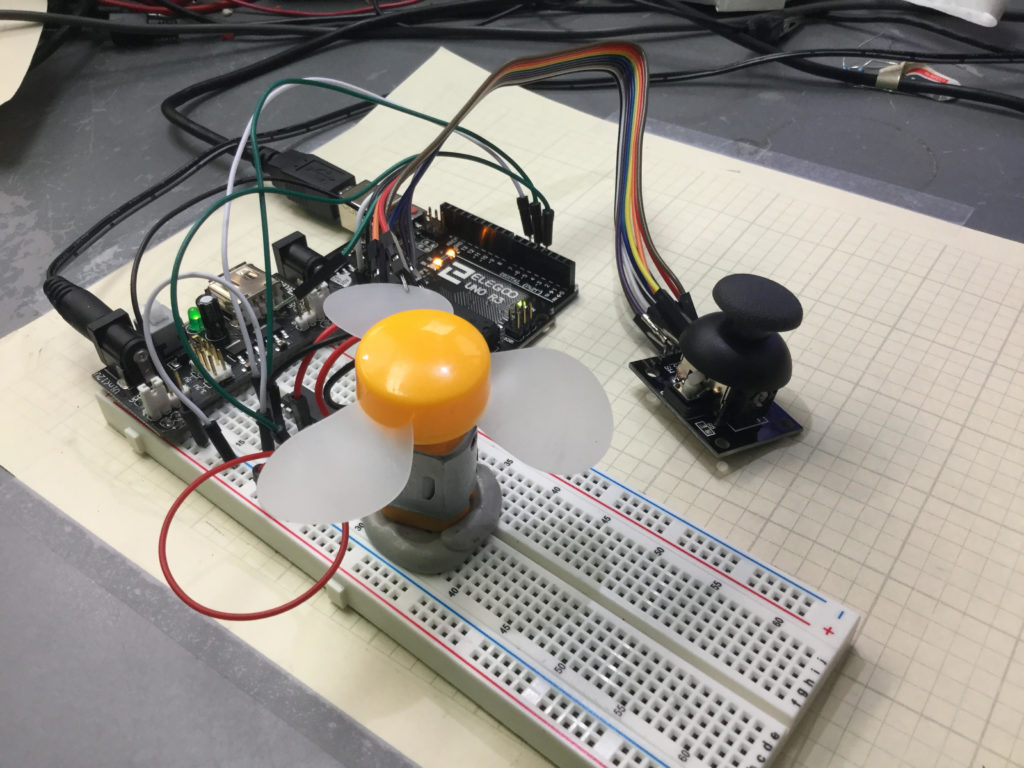
Lesson 37 and 38 showed some preliminary concepts in controlling a DC motor using an arduino and the L293D motor controller. In the video above we show how to control the speed and direction of a simple DC motor using a joystick. In the neutral position, the motor is stationary. Then the speed smoothly increases as you move the joystick forward, until you reach maximum speed.
Lesson 37 and 38 showed some preliminary concepts in controlling a DC motor using an arduino and the L293D motor controller. In the video above we show how to control the speed and direction of a simple DC motor using a joystick. In the neutral position, the motor is stationary. Then the speed smoothly increases as you move the joystick forward, until you reach maximum speed. Similarly, in pulling the joystick back from the neutral position, the motor gradually increases speed in the reverse direction. The diagram below shows the basic motor control schematic we are working from.
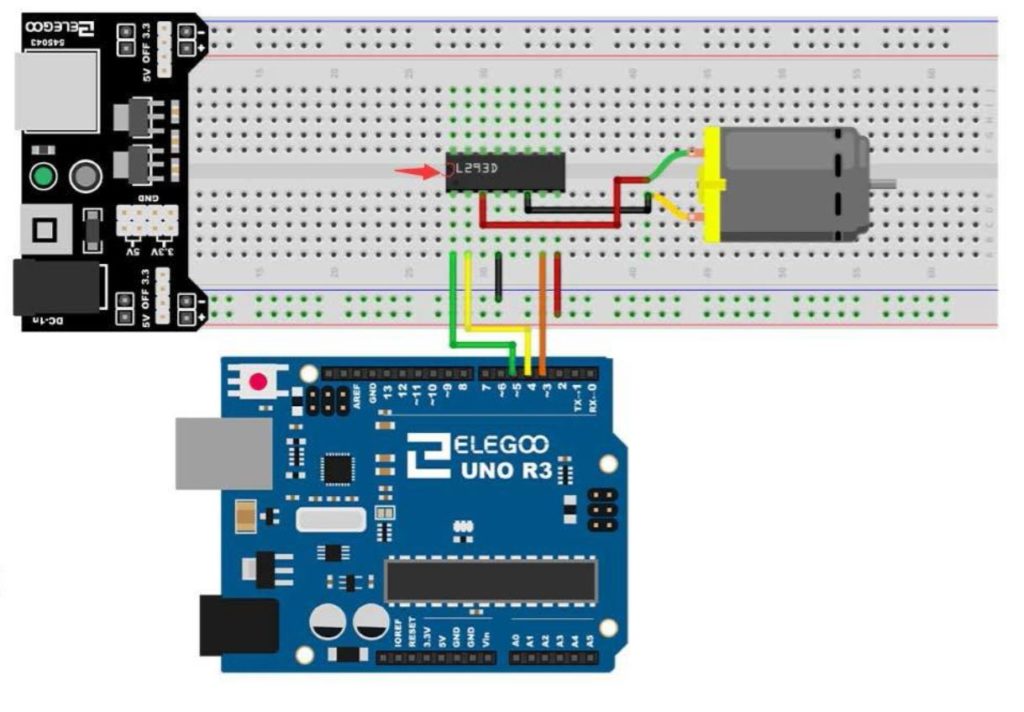
In the circuit diagram above, we also add a wire to connect the arduino ground to the power supply ground. It is always good to have all components connected to a common ground rail. Of course, you also need to add the joystick controller as shown in the video.
This is the code we used in this
1 2 3 4 5 6 7 8 9 10 11 12 13 14 15 16 17 18 19 20 21 22 23 24 25 26 27 28 29 30 31 32 33 34 35 | int speedPin=5; int dir1=4; int dir2=3; int mSpeed; int jPin=A1; int jVal; void setup() { // put your setup code here, to run once: pinMode(speedPin,OUTPUT); pinMode(dir1,OUTPUT); pinMode(dir2,OUTPUT); pinMode(jPin,INPUT); Serial.begin(9600); } void loop() { // put your main code here, to run repeatedly: jVal=analogRead(jPin); Serial.println(jVal); if (jVal<512){ digitalWrite(dir1,LOW); digitalWrite(dir2,HIGH); mSpeed=-255./512.*jVal+255.; analogWrite(speedPin,mSpeed); } if(jVal>=512){ digitalWrite(dir1,HIGH); digitalWrite(dir2,LOW); mSpeed=(255./512.)*jVal-255.; analogWrite(speedPin,mSpeed); } } |
9-Axis IMU LESSON 16: How to Install and Configure Pyscripter
As we move forward, we could really benefit from a better text editor than IDLE to edit our Python Code. In today’s lesson I show you how to download and install Pyscripter, which will make your python coding much easier. I suggest you follow these instructions and move to Pyscripter, as I will be using it for future lessons.
Arduino Tutorial 38: Using a Tilt Switch Cut Off With a DC Motor
In this lesson we explore how to add a tilt cutoff to our DC motor project. In many cases, you may want to automatically turn your motors off in the case where your project or robot tips over. The tilt switch is a simple way to do this. The video below takes you through the process step-by-step.
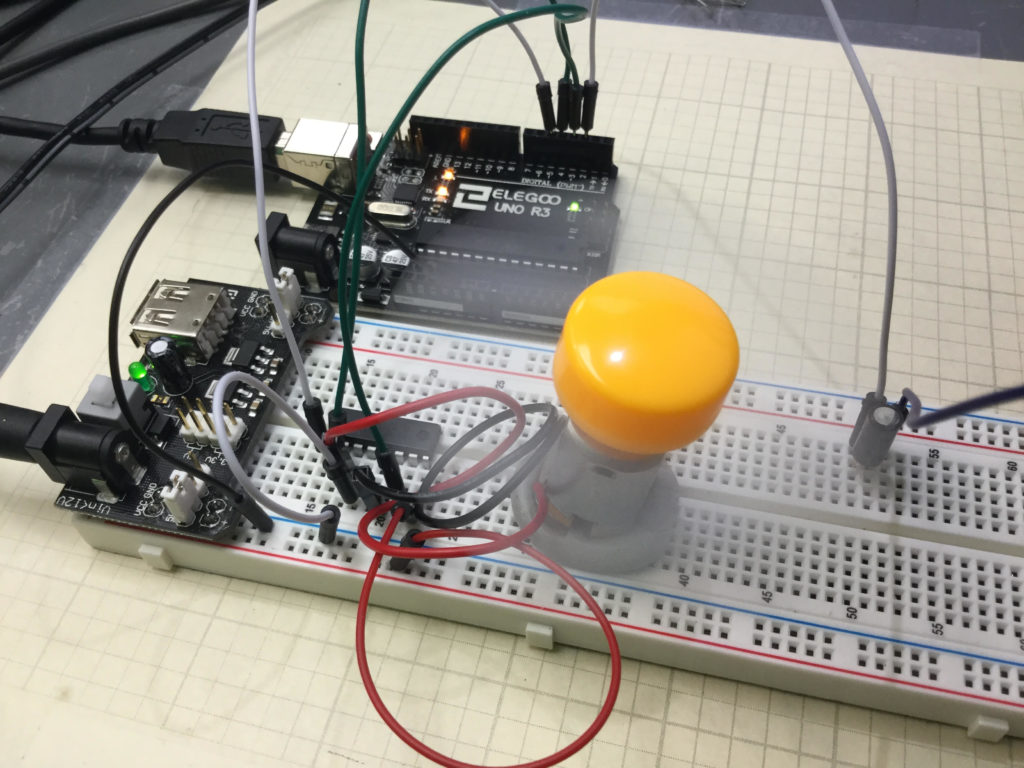
If you need help hooking the circuit up, the diagram below shows you a schematic of what we are working with. All these components are part of our ELEGOO Super Starter Kit.
In addition, you will need to add the tilt switch, as shown in the video.
Below is the code we used, with the tilt switch connected to pin 2 on the arduino.
1 2 3 4 5 6 7 8 9 10 11 12 13 14 15 16 17 18 19 20 21 22 23 24 25 26 27 28 29 30 31 32 | int speedPin=5; int dir1=4; int dir2=3; int mSpeed=255; int tiltPin=2; int tiltVal; void setup() { // put your setup code here, to run once: pinMode(speedPin,OUTPUT); pinMode(dir1,OUTPUT); pinMode(dir2,OUTPUT); pinMode(tiltPin,INPUT); digitalWrite(tiltPin,HIGH); Serial.begin(9600); } void loop() { // put your main code here, to run repeatedly: digitalWrite(dir1,LOW); digitalWrite(dir2,HIGH); tiltVal=digitalRead(tiltPin); Serial.println(tiltVal); if (tiltVal==0){ analogWrite(speedPin,mSpeed); } if (tiltVal==1){ analogWrite(speedPin,0); } } |
9-Axis IMU LESSON 15: Dynamic 3D Visualizations in Vpython
In this lesson we show you how to animate, or bring your Vpython objects to life by changing their parameters dynamically. In later lessons we will do this via life readings from sensors.