This Lesson finishes the work that was begun in Python with Arduino LESSON 4. In that lesson we built the circuit and programmed the arduino to measure the distance to a target and the color of the target. The program then output that data to the serial port. In today’s lesson we will use python to read that data stream, and use the data to dynamically update a virtual world we create.
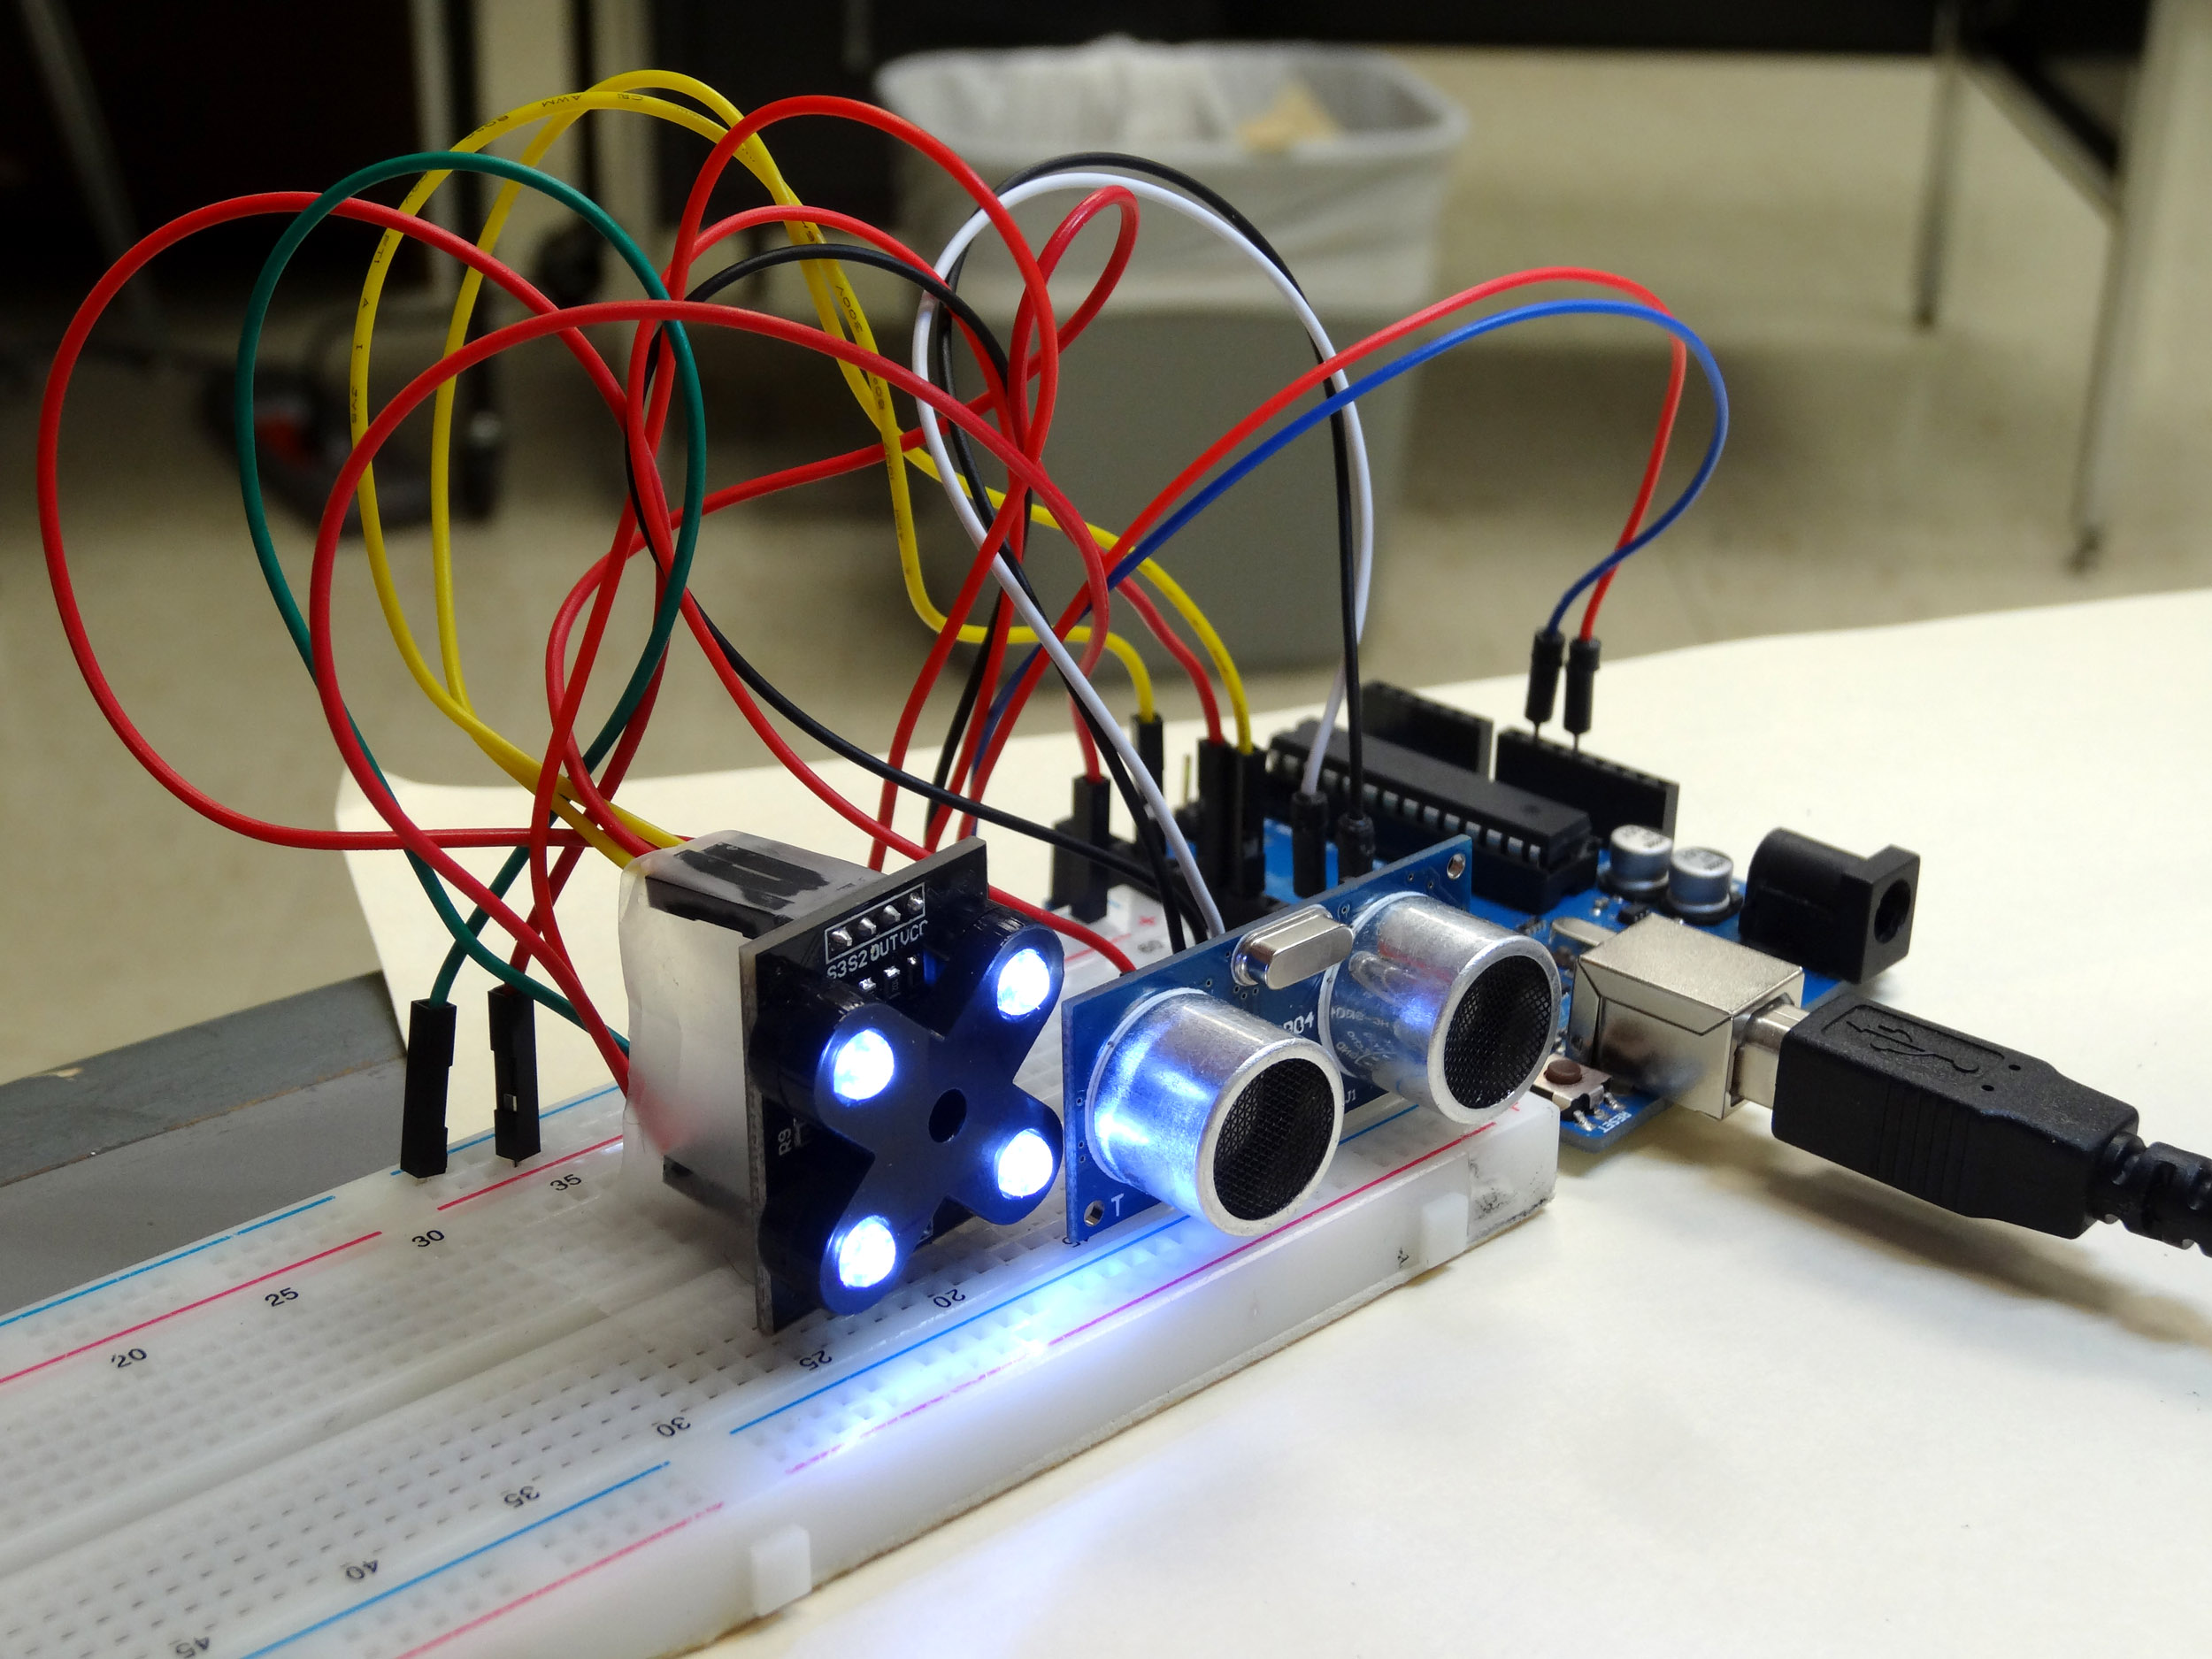
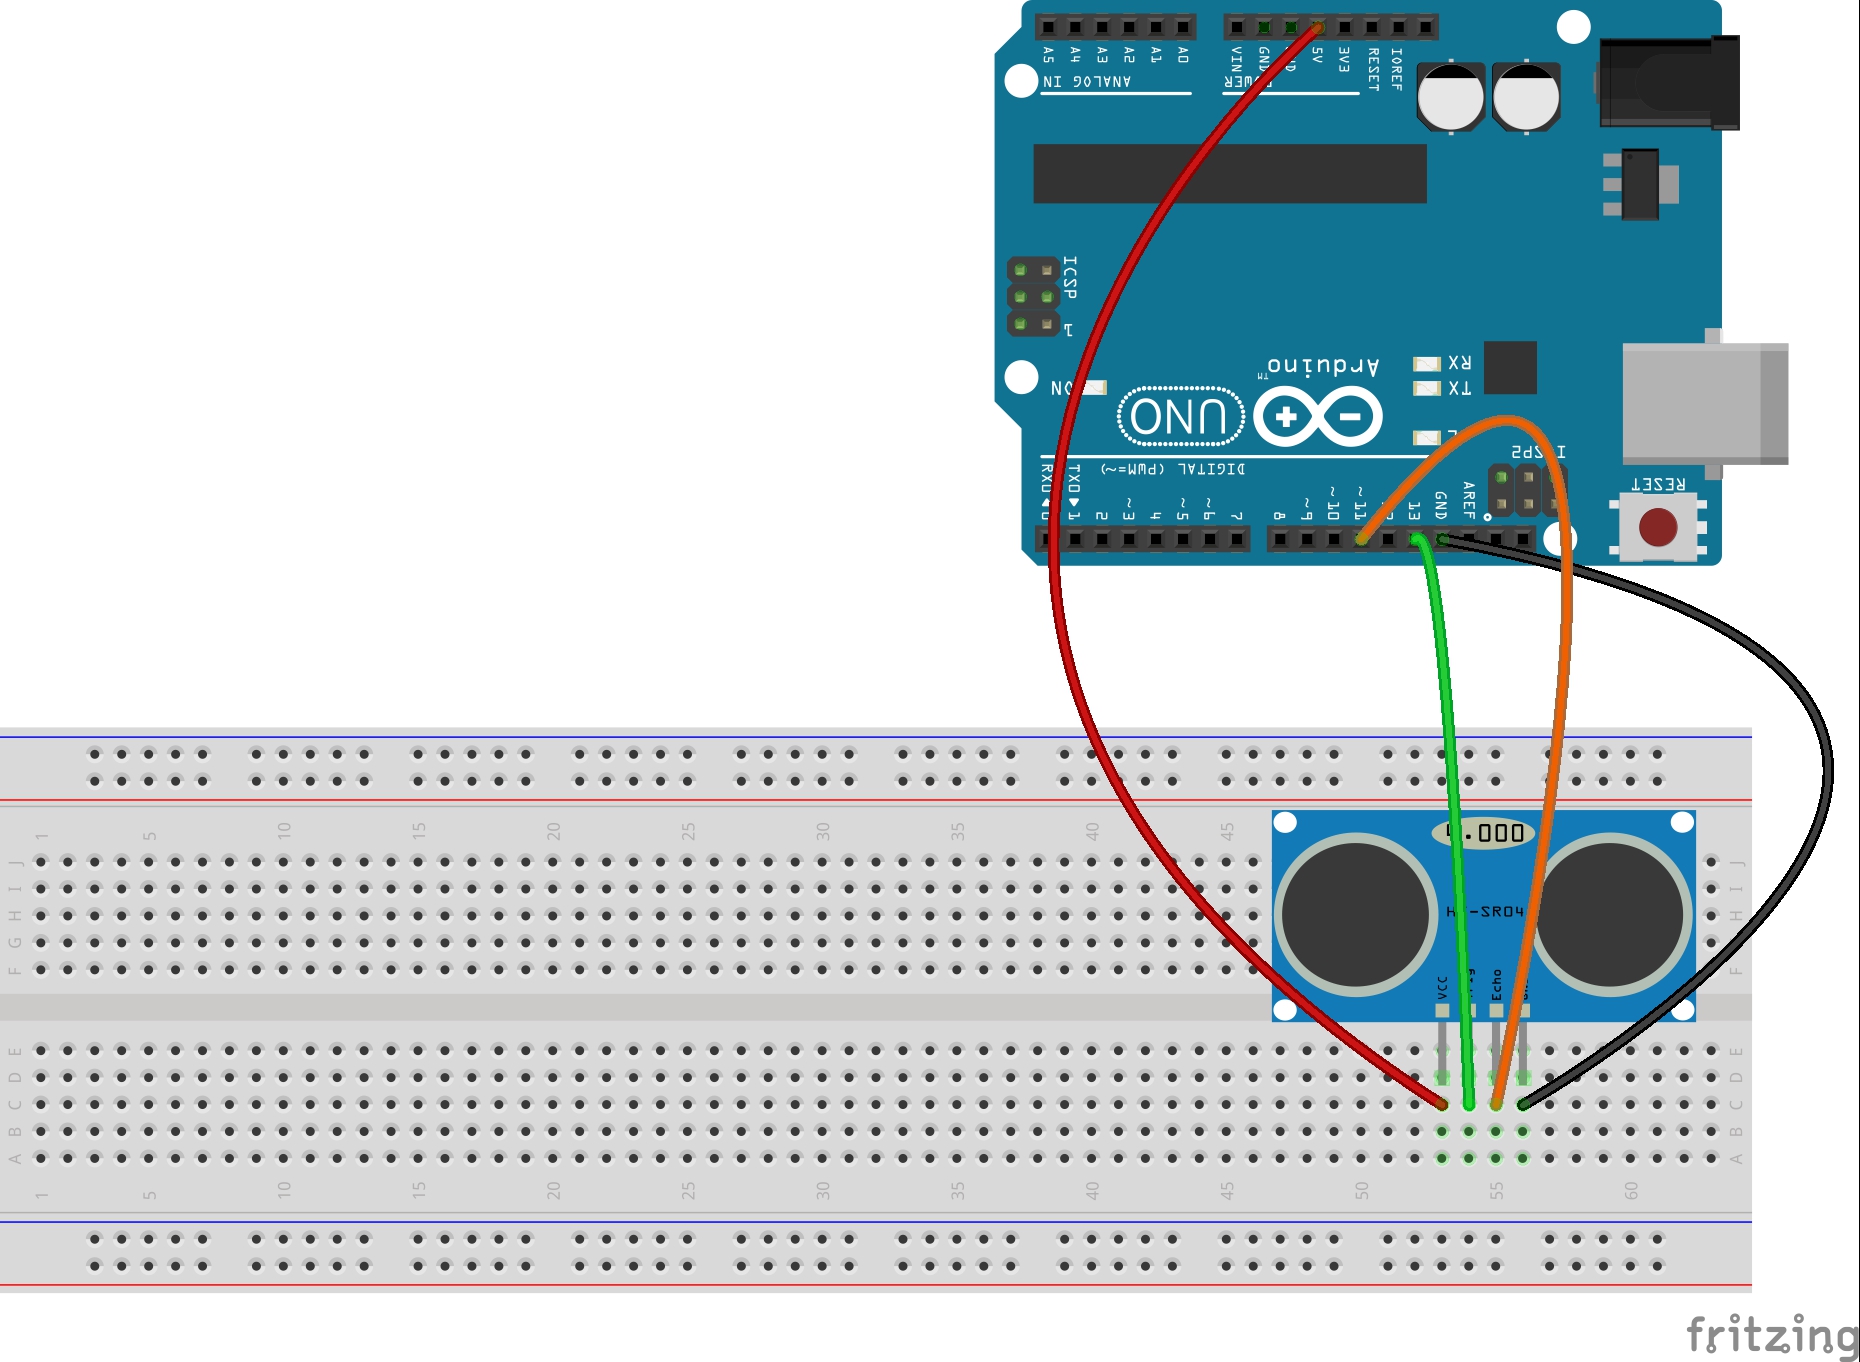
You will need to start with the work in LESSON 4 to get your circuit working, and your arduino programmed up. Once you have done that, you are ready to use Python to program up your virtual world. Remember you will need to have the pyserial and the vPython libraries loaded. We showed how to install the software in Python with Arduino LESSON 2.
In the video we will go through the process step-by-step to create a virtual world. The code we end up with is posted below. You should not copy and paste the code, but just glance at it if you get stuck. In the end, you should develop your own virtual world and just use mine as a guide if you need more help.
1 2 3 4 5 6 7 8 9 10 11 12 13 14 15 16 17 18 19 20 21 22 23 24 25 26 27 28 29 30 31 32 33 34 35 36 37 38 39 40 | ## This program reads data over the serial port ## from that arduino. You have to read an entire line of data ## and then you have to parse it into different number values ## Then those R, G, B numbers are used to make the color of ## a visual object in python change. import serial #import serial library from visual import * #import vPython library MyScene=display(title='My Virtual World') #Create your scene and give it a title. MyScene.width=800 #We can set the dimension of your visual box. 800X800 pixels works well on my screen MyScene.height= 800 MyScene.autoscale=False #We want to set the range of the scene manually for better control. Turn autoscale off MyScene.range = (12,12,12) #Set range of your scene to be 12 inches by 12 inches by 12 inches. target=box(length=.1, width=10,height=5, pos=(-6,0,0)) #Create the object that will represent your target (which is a colored card for our project) myBoxEnd=box(length=.1, width=10,height=5, pos=(-8.5,0,0)) #This object is the little square that is the back of the ultrasonic sensor myTube2=cylinder(color=color.blue, pos=(-8.5,0,-2.5), radius=1.5,length=2.5 ) #One of the 'tubes' in the front of the ultrasonic sensor myTube3=cylinder(color=color.blue, pos=(-8.5,0,2.5), radius=1.5,length=2.5 ) #Other tube myBall=sphere(color=color.red, radius=.3) sensorData= serial.Serial('com11',115200) # Create senorData object to read serial port data coming from arduino while True: #This is a while loop that will loop forever, since True is always True. rate(25) #We need to tell Vpython how fast to go through the loop. 25 times a second works pretty well while(sensorData.inWaiting()==0): # Wait here untill there is data on the Serial Port pass # Do nothing, just loop until data arrives textline = sensorData.readline() # read the entire line of text dataNums=textline.split(',') #Remember to split the line of text into an array at the commas red=float(dataNums[0]) # Make variables for Red, Blue, Green. Remember green=float(dataNums[1]) # the array was read as text, so must be converted blue=float(dataNums[2]) # to numbers with float command dist=float(dataNums[3]) # last number in the list is the distance blue=blue*.7 #On my sensor, blue is always a little too strong, so I tone it down a little if (dist>=1.5 and dist<=2.25): #only change color or target if target is between 1.5 and 2.25 inches from sensor target.color=(red/255., green/255., blue/255.) #This keeps color from flickering. target.pos=vector(-6 + dist,0,0) #Adjust the position of the target object to match the distance of the real target from the real sensor |
The video explains each line of the code. Play around and tweak the values and see the effect on your virtual scene. Now your assignment is to take what you have learned here, and continue to expand your virtual world. Add objects to your virtual scene. Perhaps build an object for the breadboard, color sensor and arduino. I will give you several days to do this, and then when I come around for a project grade, I will want to see who has built the most impressive virtual scene. You should go well beyond the simple demonstration I have done here.